
![]() Click to view the tutorial video.
Click to view the tutorial video.

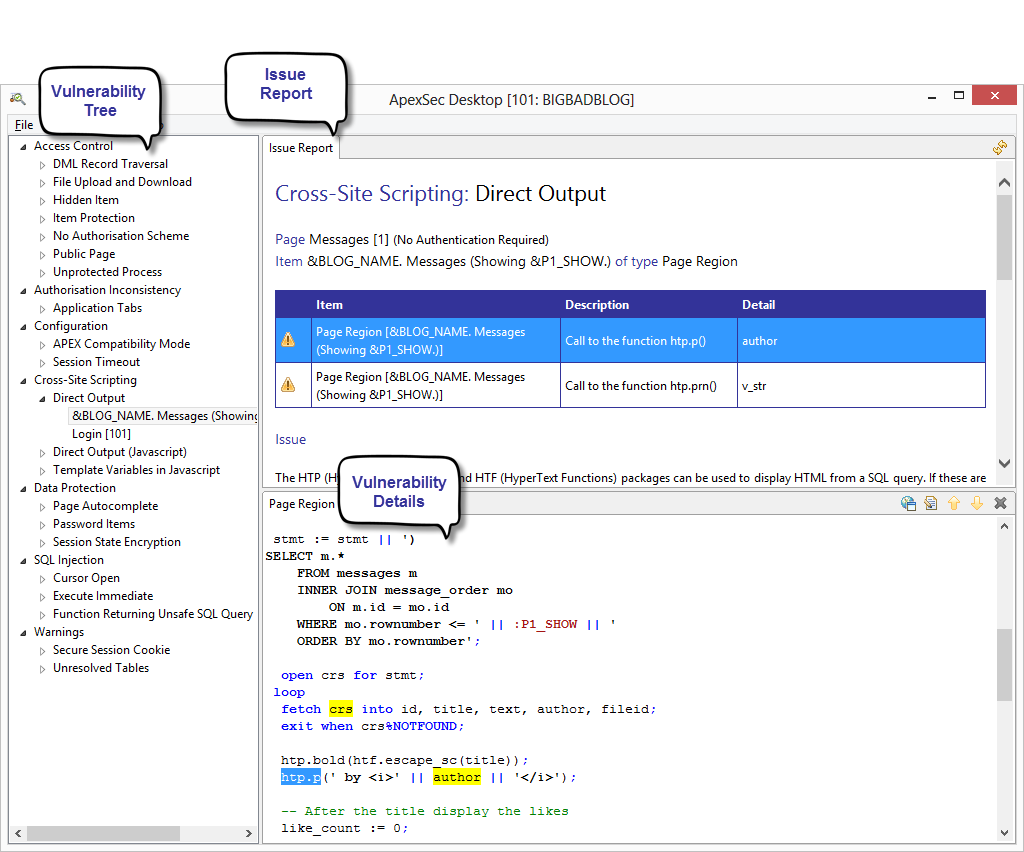
When ApexSec finishes the security assessment of your APEX application, the above screen is displayed. On the left is a tree organised by vulnerability class (we’ll cover the list of classes that ApexSec detects later), and on the right is the summary report that gives a high-level overview of the security risks within your APEX application.
You can now expand and collapse the vulnerability tree using the plus and minus icon at the top of the pane.
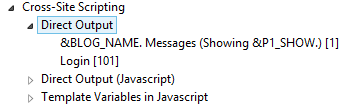
Specific details for each identified vulnerability can be accessed using the tree on the left, by expanding the node to list the affected items:
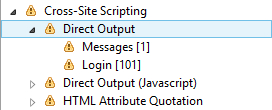
In this case, two pages are found to contain Cross-Site Scripting/Direct Output vulnerabilities (pages 1 and 101, displayed in square brackets after the page name).
Selecting an affected item causes ApexSec to display an Issue Report on the specific item you have chosen. The Details panel is displayed in the lower-right and shows the underlying code or setting that is causing the security risk. For some vulnerabilities there may be multiple tabbed areas in the Details panel, representing the different ways in which the risk can be addressed.
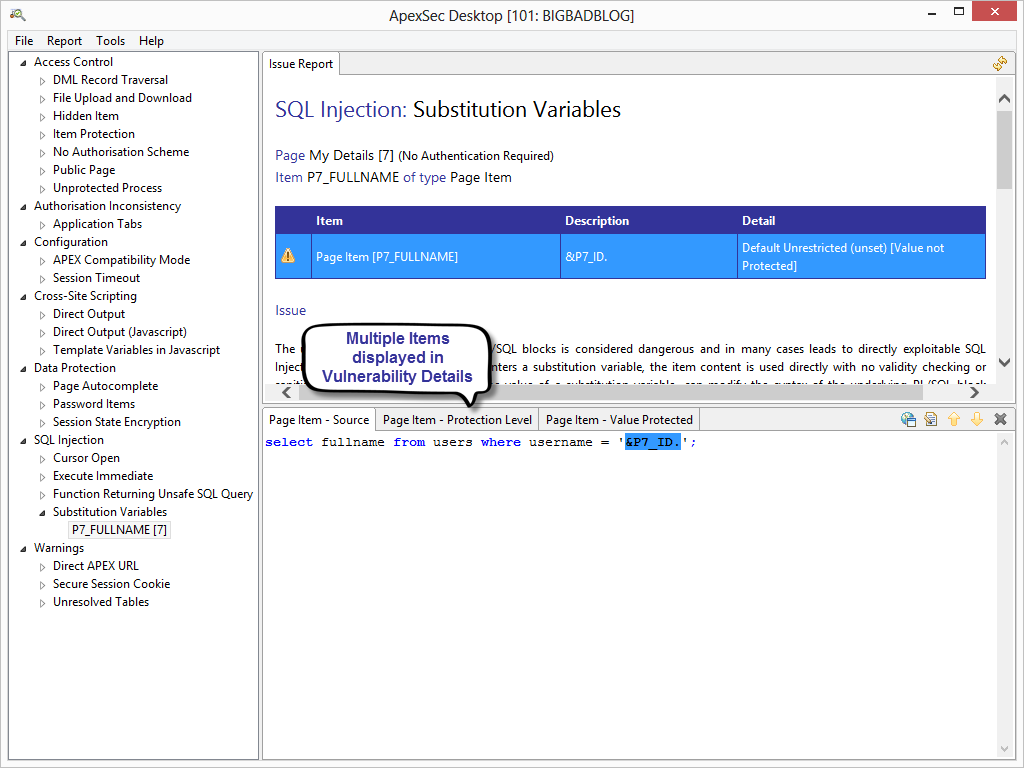
For example, the SQL Injection/Substitution Variables issue in the following screen shot has three tabs in the Vulnerability Details panel: Page Item – Source; Page Item – Protection Level; and Page Item – Value Protected. This example vulnerability can be resolved either by changing the item’s source, or by changing the protection level of the substitution item.
There are five buttons in the border of the Details panel:
![]()
These represent the following functions from left to right:
- Switch between text view and APEX Application Builder view
- Edit Developer Comments
- Display Previous Instance
- Display Next Instance
- Close the panel
Developer Comments
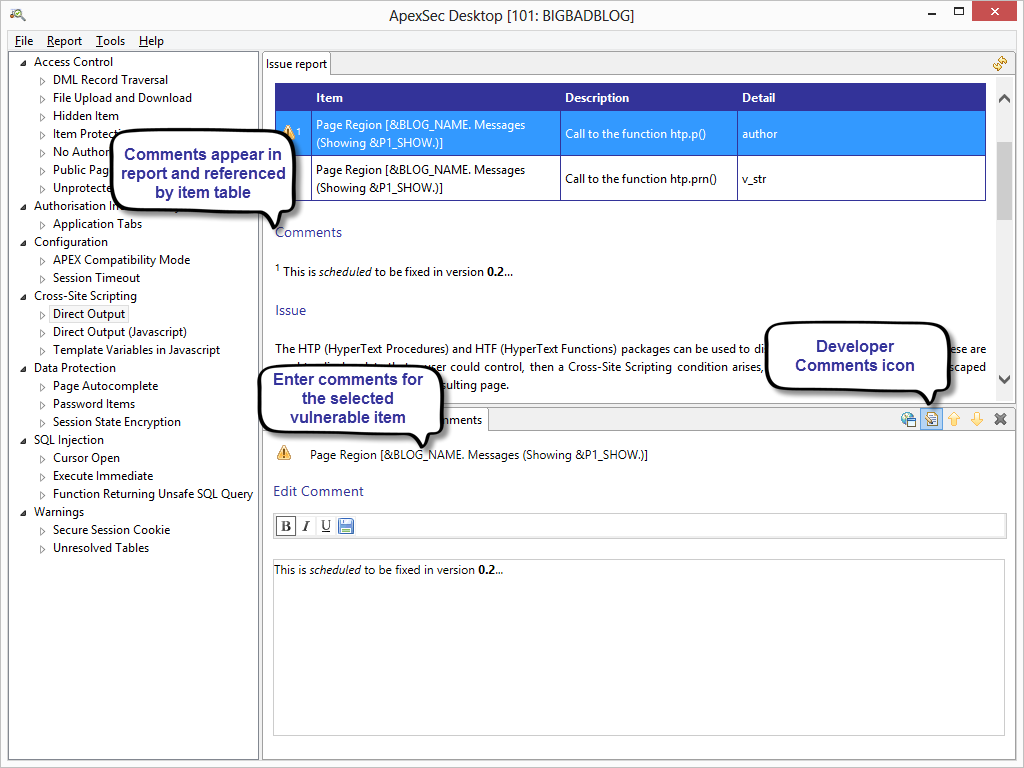
For any security risk identified by ApexSec it is possible to add Developer Comments that are displayed in the Issue Report and are also included when the Full Report is produced. This feature allows developers to provide a justification in their own words for why the issue has not / will not be resolved.
![]() To edit the developer comments for a vulnerable item, click the Developer Comments icon in the Details panel and type into the text box that is displayed.
To edit the developer comments for a vulnerable item, click the Developer Comments icon in the Details panel and type into the text box that is displayed.
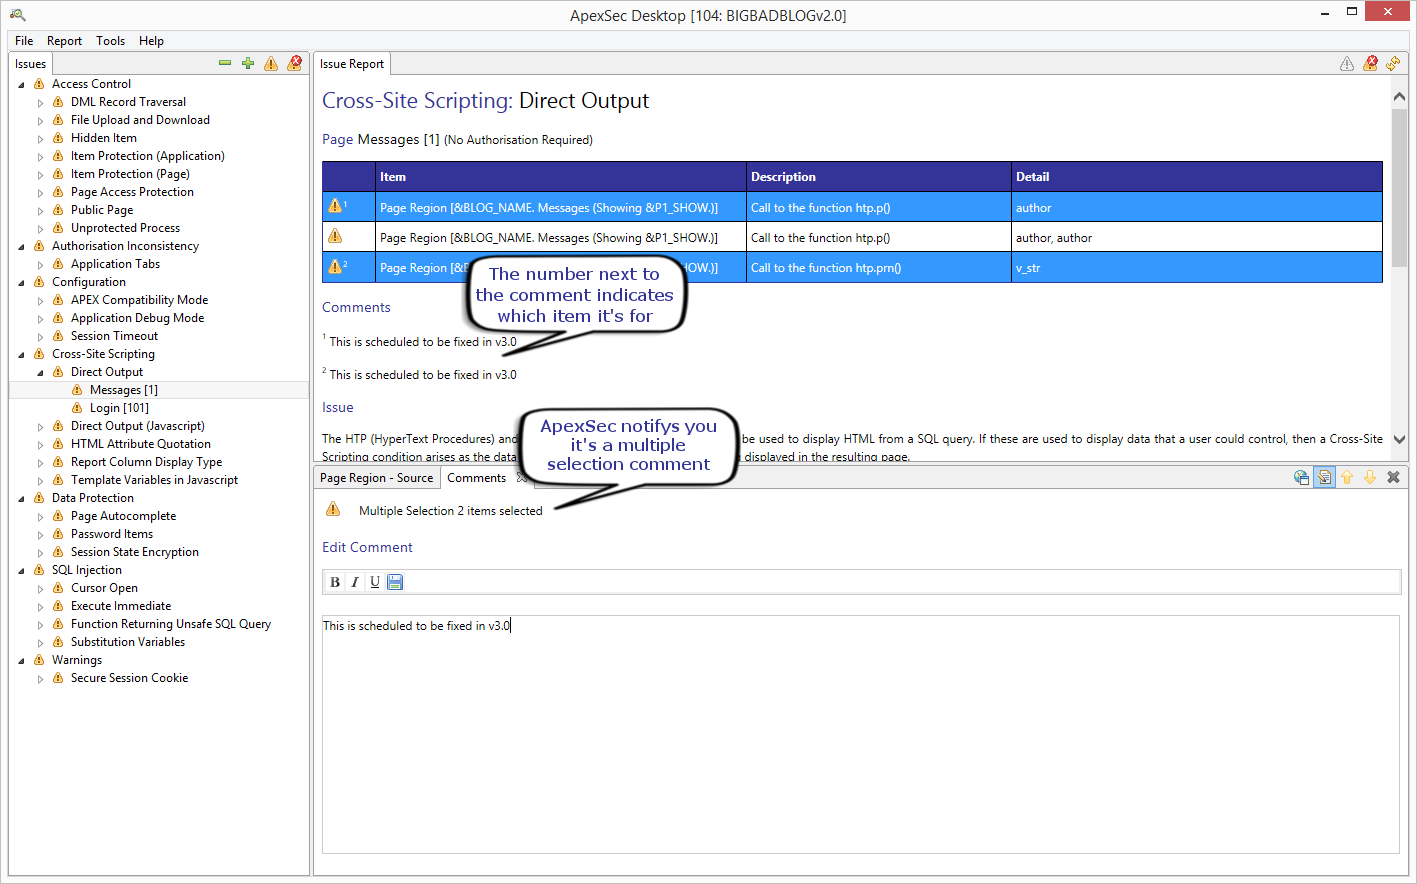
ApexSec now supports multi-line selection for comments. This allows you to select multiple lines by holding the Shift or Ctrl key and clicking the entries you would like to comment. Then you can simply add a comment and it will be applied to all your selections.
False Positives
In some cases a vulnerability reported by ApexSec will not actually be exploitable and therefore won’t represent a real threat. In these cases the issue that is reported by ApexSec can be marked as a false-positive. To quickly mark an issue as a false-positive, click on the triangle-exclamation symbol at the left of the issue in the Issue Report panel.
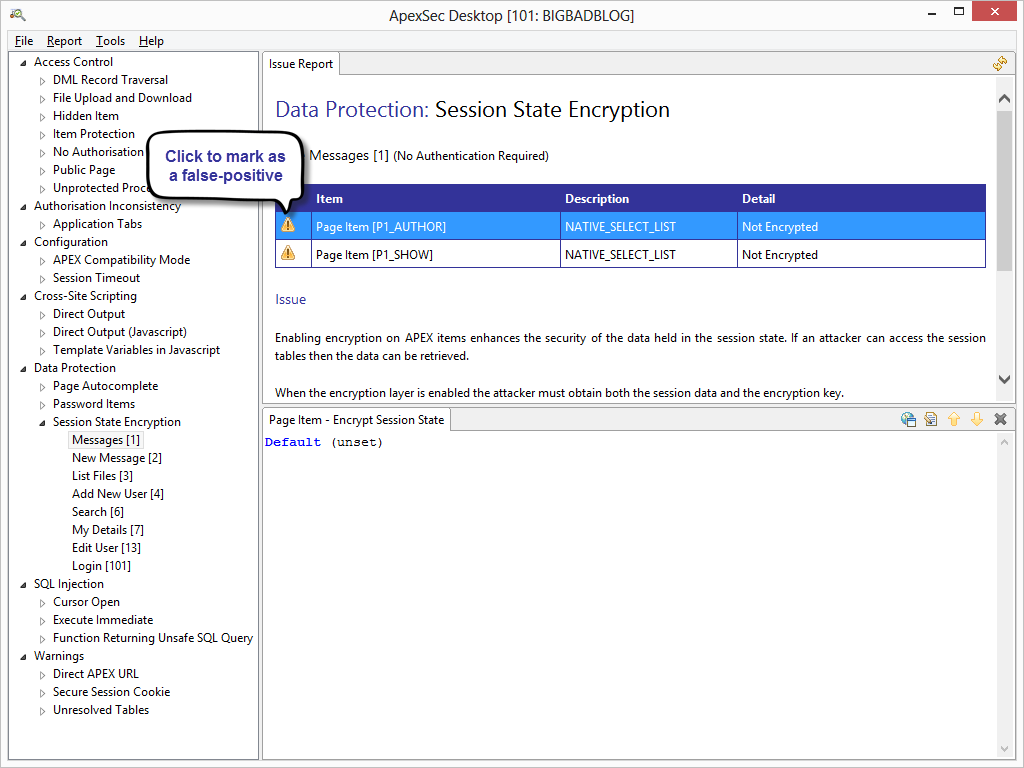
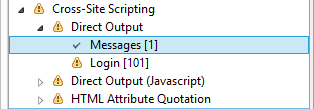
The issue is then marked as a false-positive:

Like with comments, ApexSec now supports marking false-positives using multiple selections. To do this, select the instances you would like to mark as false-positive using either a shift-click or ctrl-click. Once they are selected either click the false positive icon next to the instance like before, or use the new button at the top of the issue report.
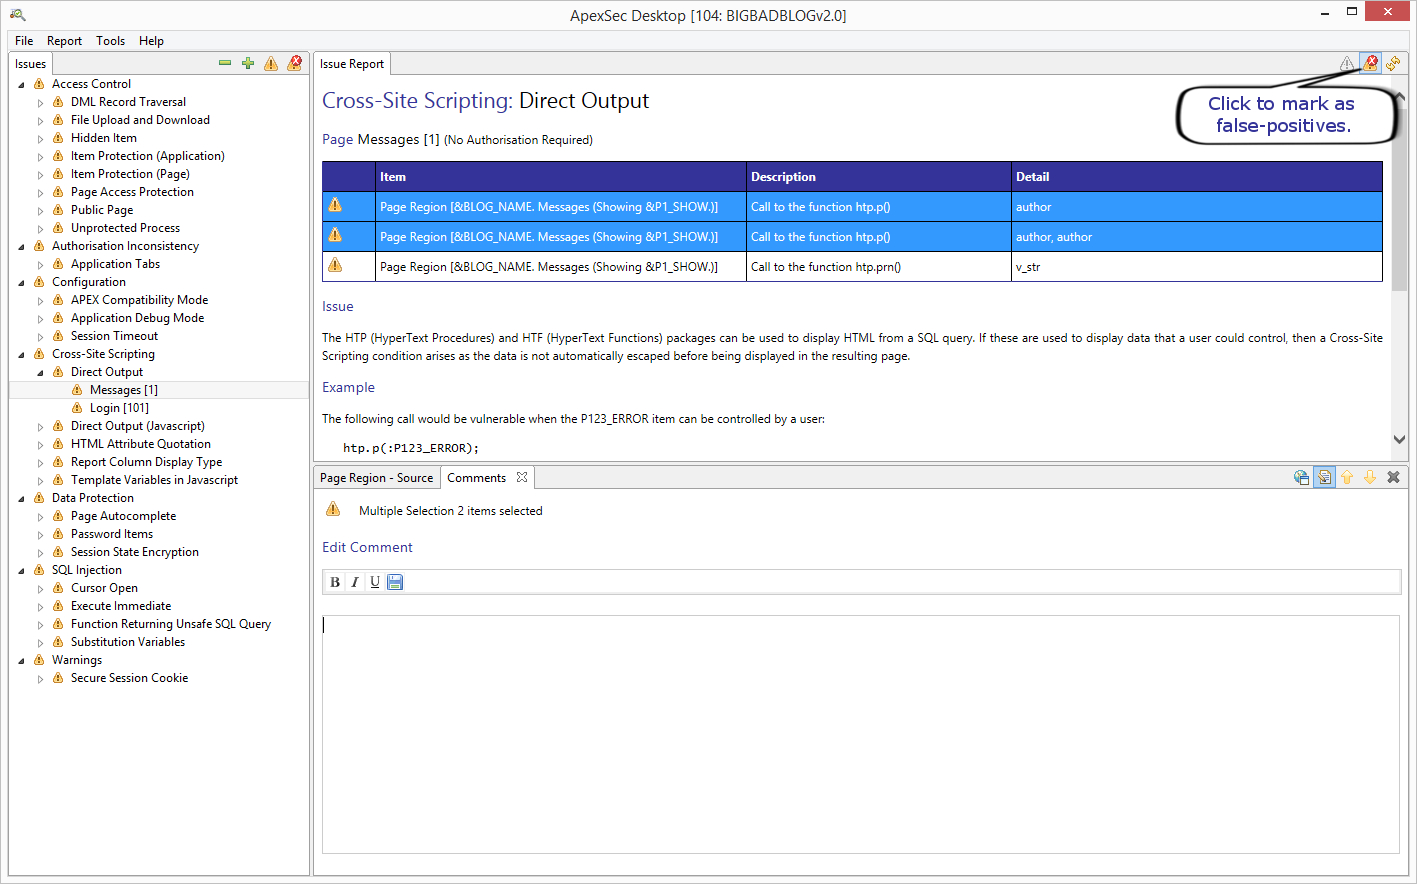
The issues are then marked as false-positives.

If you would like to mark an entire item and all the instances inside it as false-positive you can select the item in the vulnerability tree on the left and click the false-positive button at the top of the pane.
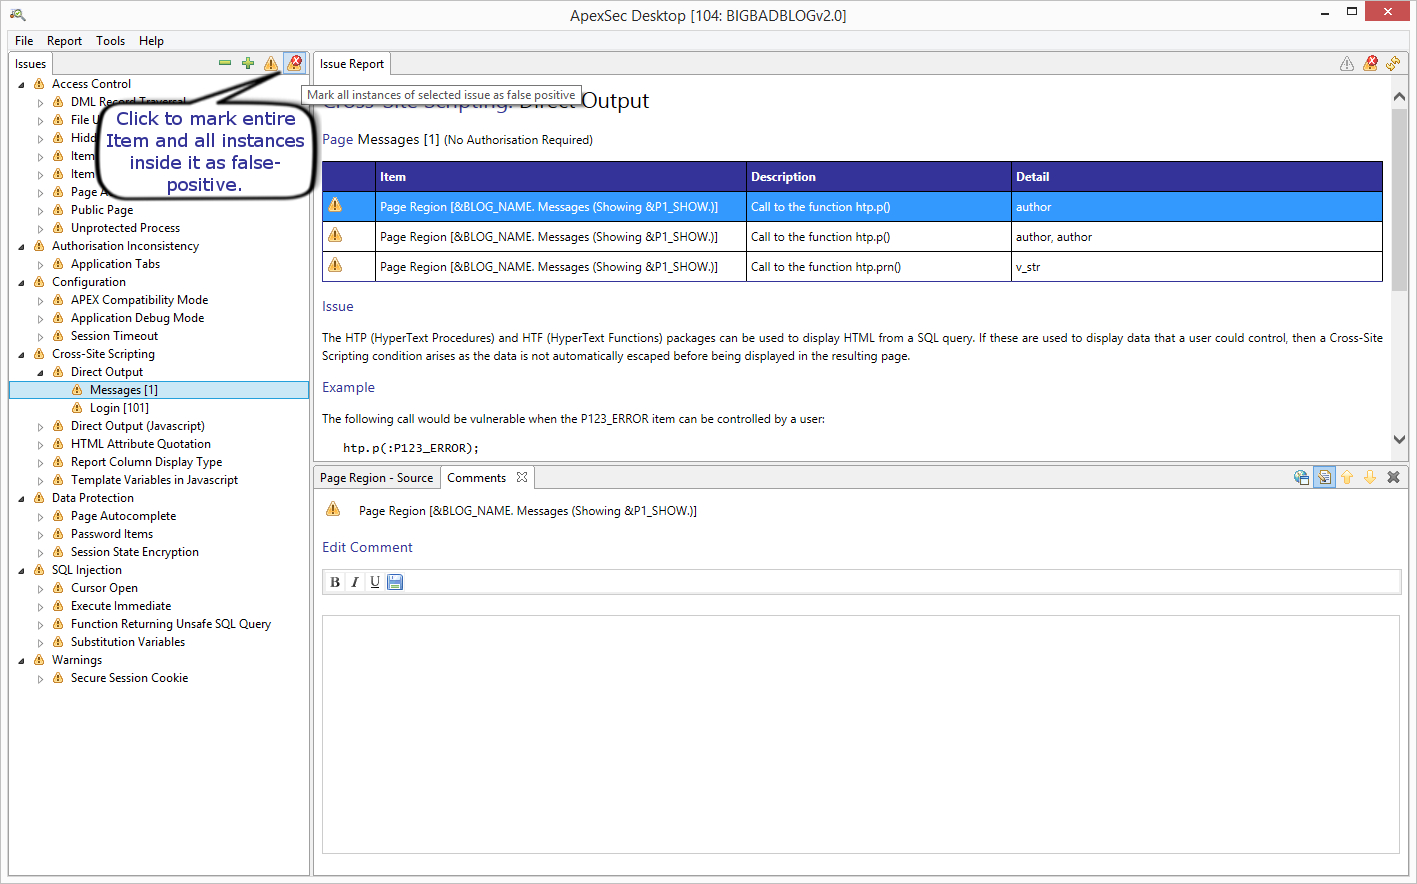
All the issues will then be marked as false-positives and the entry in the vulnerability tree will be ticked to indicate there are no longer any issues to be resolved.

Vulnerability Instances
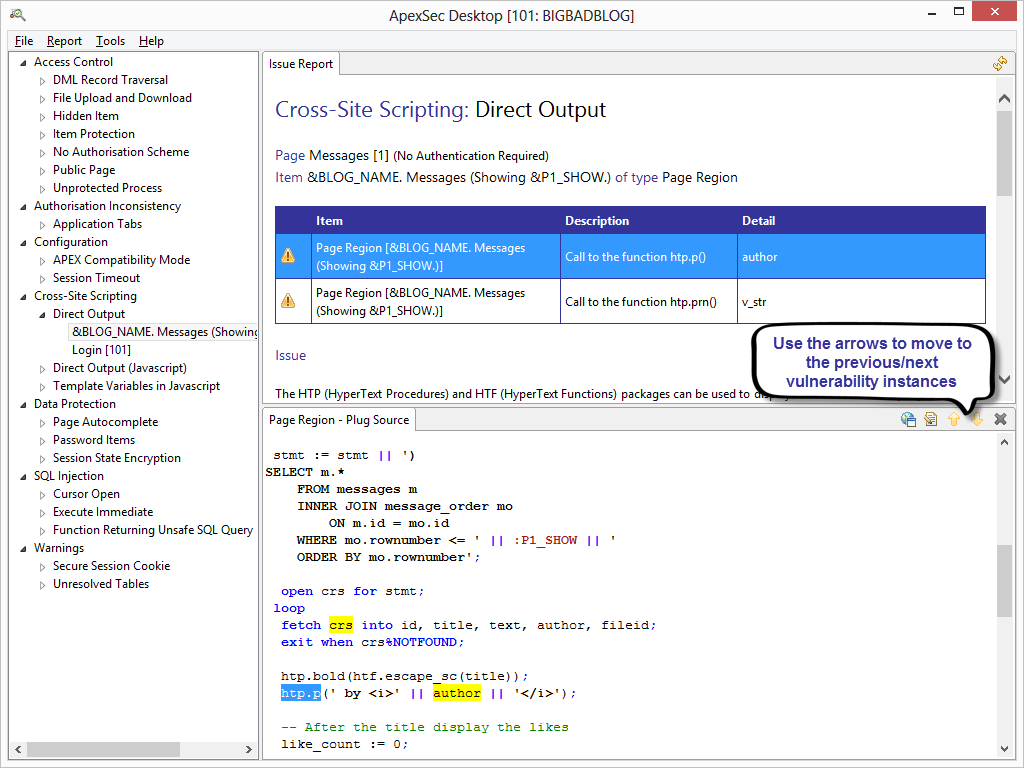
Some of the findings reported by ApexSec will have multiple instances within the same page or code block. Each instance is displayed in the table in the Issue Report panel, and selecting a row in the table will change the details in the lower-right panel.
You can also use the arrows on the Details panel to navigate forwards and backwards through instances.
The next section gives an overview of the types of vulnerability that ApexSec can identify in your APEX applications, and then we’ll talk about generating reports.
| << Previous Section: Creating a new project | Next Section: Vulnerability Classes and Types >> |