
Download & Execute
(If you already have a Hudson installation you can skip to Adding an ApexSec Job below.)
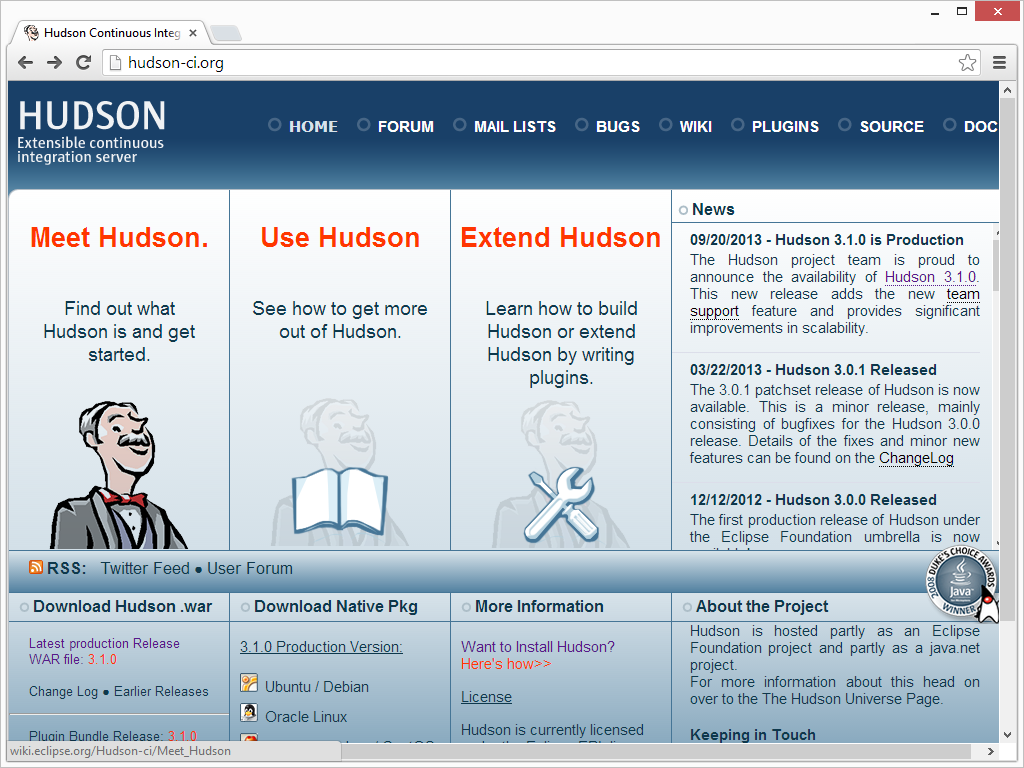
The Hudson continuous integration product can be downloaded for free in the form of a WAR file.
This can either be dropped into a Servlet container (such as Tomcat or Glassfish) or executed in standalone mode. Here we’ll simply run Hudson in standalone mode, using the command below:
java -jar hudson-3.1.0.war
This starts a local web server on your local host, listening on port 8080. Connect to the Hudson instance using your web browser and the following URL:
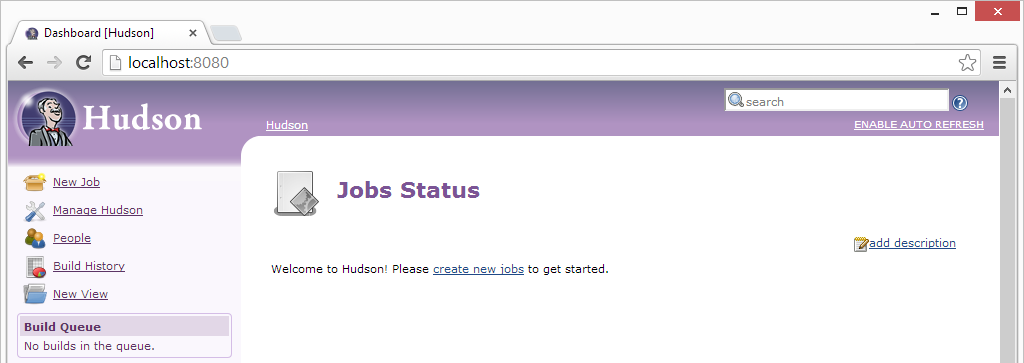
http://localhost:8080/
As this is the first run, there is a page to configure additional modules – none are needed to integrate with ApexSec so just click finish.
You will now be presented with the Hudson “Jobs Status” page, where we can create a new job for ApexSec.
Note: This is by no means a complete tutorial on Hudson. For more specific information about running and managing Hudson please see The Hudson Book.
Adding an ApexSec Job
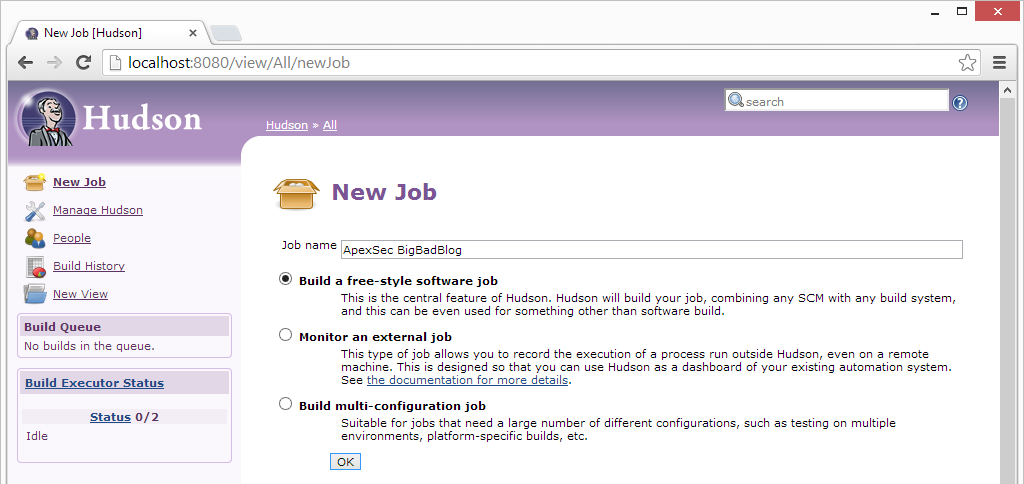
First, click New Job, then enter a descriptive name (we’ll use “ApexSec BigBadBlog” here, as we’re configuring a regular security assessment of our sample BigBadBlog application). Of the three options for the type of job, you need to choose the top one: Build a free-style software job.
When the job is created the Job Configurations page is displayed, there are three things that need to be set to get Hudson to launch ApexSec and read the resulting JUnit output.
Advanced
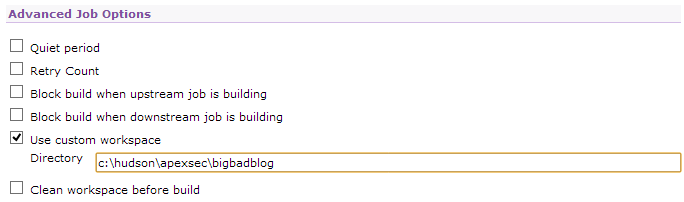
Under Advanced Job Options | Use Custom Workspace, you should enter a path that will store the JUnit output produced by ApexSec.
Build
In the Build section, click Add Build Step and select Execute Windows batch command. This allows you to enter the command-line used to launch ApexSec. When run from the command-line, ApexSec can analyse an application in the same three ways as when creating a new project: from the APEX Application Builder URL, from an Oracle database TNS connection, or from an APEX export file.
If you already have a pre-existing ApexSec project file and would prefer not to include your login details in Hudson’s job configuration section, see Using the Re-Scan Feature below.
Note: We’re using the caret (^) character to split the Windows command-line over multiple lines for clarity; under Linux the backslash (\) should be used instead.
To connect to the APEX Application Builder:
java -jar c:\hudson\apexsec\apexsec-win64.jar ^
 --url http://10.0.0.180/apex/ ^
 --workspace TEST ^
 --user admin ^
 --pass myworkspacepassword ^
 --savepassword ^
 --appid 101 ^
 --junit ^
 c:\hudson\apexsec\bigbadblog\bbb.apexsec
To connect via an Oracle database TNS connection:
java -jar c:\hudson\apexsec\apexsec-win64.jar ^
 --host 10.0.0.180 ^
 --sid APEX421 ^
 --port 1521 ^
 --user TEST ^
 --pass myschemapassword ^
 --savepassword ^
 --appid 101 ^
 --junit ^
 c:\hudson\apexsec\bigbadblog\bbb.apexsec
Note: The --savepassword option is used to include your password in the ApexSec project file, this is both for convenience when using ApexSec Desktop and is also necessary when using a pre-existing project file to run a Hudson job.
To analyse an application exported to a file:
java -jar c:\hudson\apexsec\apexsec-win64.jar ^
 --file c:\hudson\apexsec\bigbadblog\BigBadBlog.sql ^
 --junit ^
 c:\hudson\apexsec\bigbadblog\bbb.apexsec
Note: If you are scheduling an ApexSec analysis of an APEX application based on the export file, remember that you’ll need to have some secondary process that ensures the export file represents the current development version of the application, such as a source-control checkout.
For our job we are going to instruct ApexSec to get the BigBadBlog application (ID 101) via an APEX Application Builder URL and provide our workspace credentials:
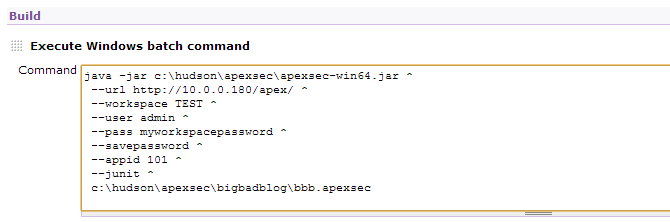
Enter the ApexSec command-line relevant for your environment, ensuring that the path to the ApexSec JAR is correct and the last line specifies a project file name that is fully qualified and matches the custom workspace directory.
Post-build Actions
Select Post-Build Actions | Publish JUnit test result report and enter the file name of the JUnit output generated by ApexSec. This will be the project name you entered for the project file above, with “.junit.xml” added onto the end (i.e “bbb.apexsec.junit.xml”). Or you can use a file matching character (*) which will select the junit output of any projects in the directory.

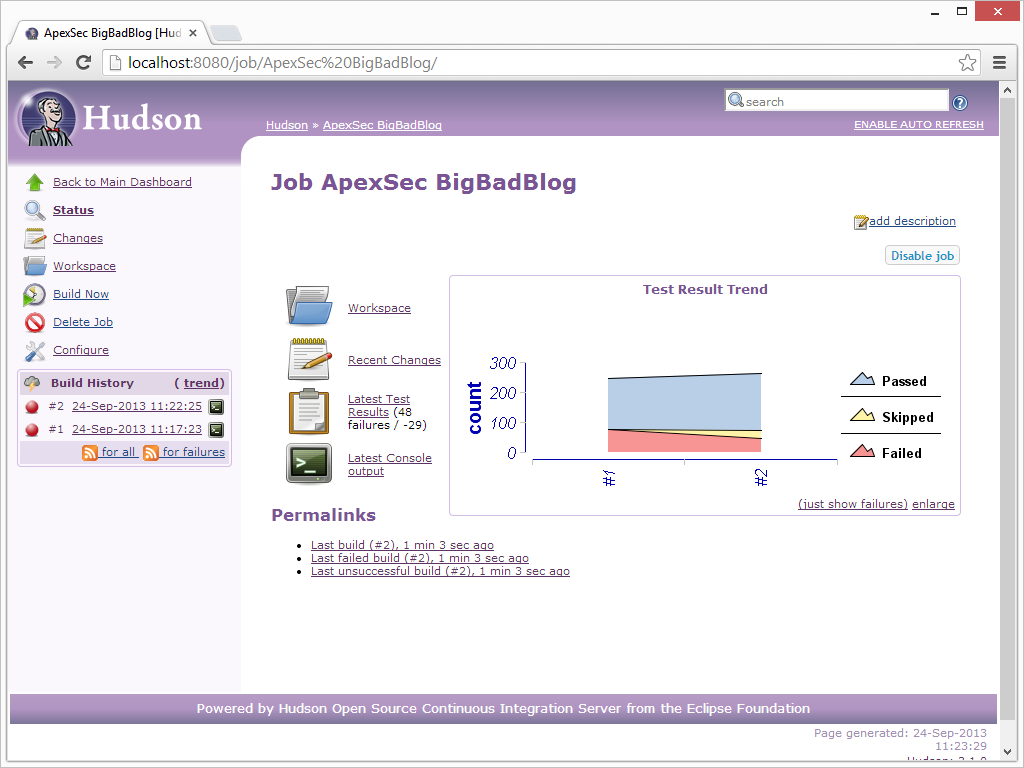
The Hudson job is now configured to run ApexSec and analyse the results.
Running the job
The Build Now link on the left can be used to instruct Hudson to execute ApexSec and collect the results. This is useful for testing and diagnosing problems with the configuration. When the run is complete click on the link within the Build History and select Console Output page to check that everything executed as expected; any connection or login errors will be reported by ApexSec to the console.
Once you are satisfied that the build is working, you can choose Configure Job and schedule regular execution of the build:
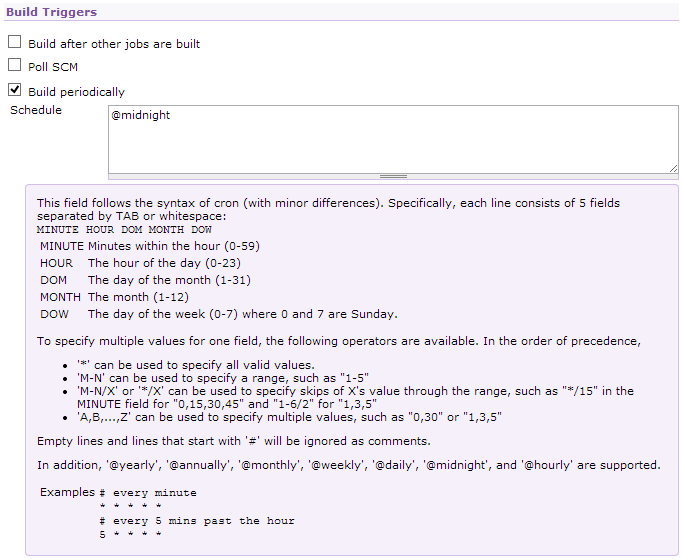
(The Hudson help shown above provides a great explanation of how to format the schedule field.)
Using the Re-Scan Feature
You can use a pre-existing ApexSec project file to create your Hudson job. To do this you must have checked the “Save Login Password with Project” option when saving your project file from ApexSec Desktop.
The password can also be saved in your ApexSec project file using the --savepassword option from the command line. This option can be included in the Execute Windows Batch Command section of your Hudson build (see the Build section).
To use a pre-existing ApexSec project file to create your Hudson job, you can set the command in the Build section to use the rescan option:
java -jar c:\hudson\apexsec\apexsec-win64.jar ^
 --rescan ^
 --junit ^
 c:hudson\apexsec\bigbadblog\bbb.apexsec
Monitoring Changes
The ApexSec project that is saved by the Hudson build (bbb.apexsec) can be opened with ApexSec Desktop, and you can mark certain findings as false positives. When the project is saved back to the same file, the next Hudson build will honour the items marked as false positives and no longer report them as failures.
If the application is modified between Hudson builds any new vulnerabilities will be represented as additional failures, and issues that have been correctly resolved will lower the failure count.
With our BigBadBlog application, after the initial run we use ApexSec Desktop for some maintenance work, addressing the identified security risks:
- Mark all the “Session State Encryption” items as false positives.
- Resolve the SQL Injection caused by a Substitution Variable on page 7.
- Fix Cross-Site Scripting / Direct Output issues on page 1.
The second Hudson build then reports a change in the security of the application:
Rather than securing applications towards the end of development, this method allows you to keep on top of your security throughout the development process. With a regular scheduled build within Hudson that executes ApexSec, you can continually monitor your APEX applications to identify increasing or decreasing levels of security.
Maintaining application security throughout development can often save a lot of time and effort, as some vulnerabilities cannot be mitigated without altering the logic or functionality of your application. This proves to be difficult post-development and can lead to a major overhaul of your application design.